


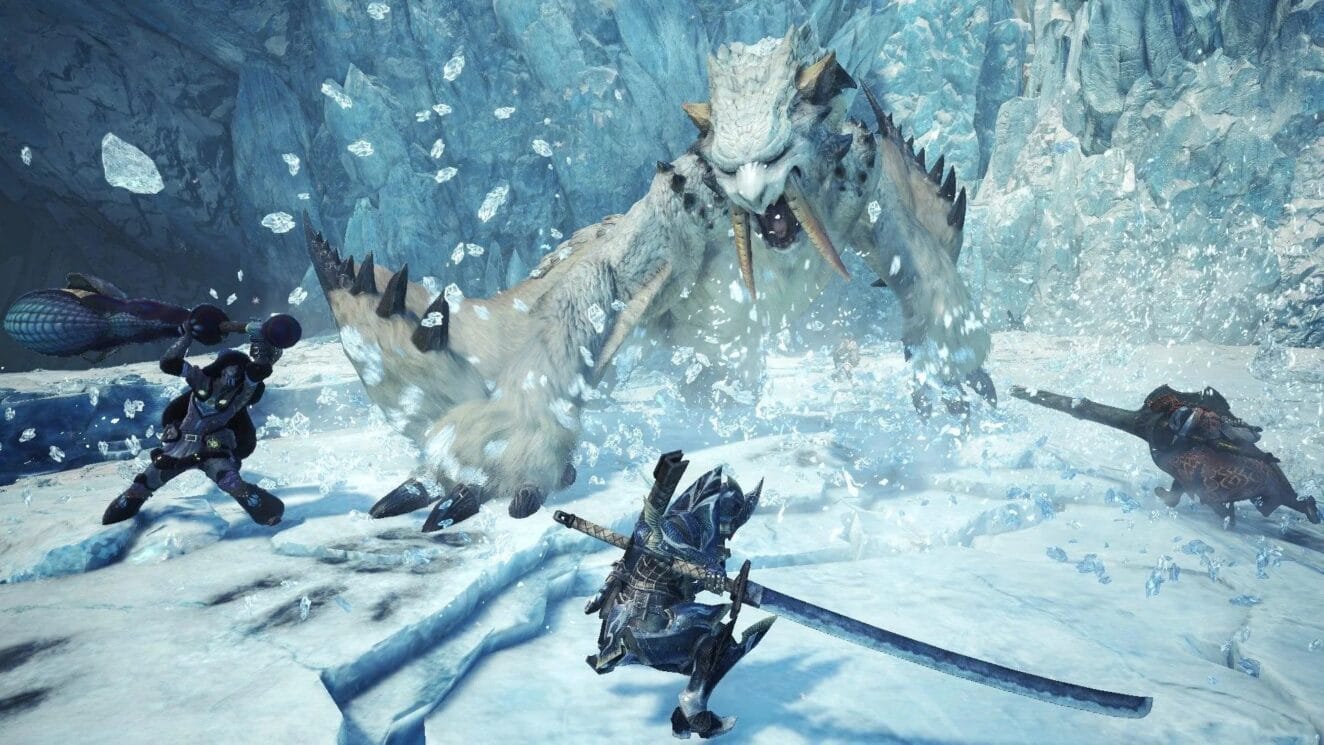
The winds are blowing hard and that, in a strange world, is not always good news. More when you know that dangerous creatures inhabit it that will do everything necessary to eradicate the invaders. Therefore, in HDGamers we will prepare you to save humanity with the best MHW Builds.
With them you can walk through this mysterious world as if it were your home. Above all, for having the necessary protection not to die during your arrival and to become a true monster hunter.
What are Monster Hunter World builds?
Like any good exponent of the role-playing genre, Monster Hunter World presents us with an incredible story. In addition to having a series of missions that will quickly make this one of your favorite titles.
However, you will need the help of a character who has the ability and, above all, the necessary tools to meet the objectives of the game. To do this, Monster Hunter World presents a well-nourished gallery of equipment to combine and create the most effective hunter in the galaxy.
It should be noted that this is the first great challenge presented by the game, Although it is a somewhat complicated issue, it can be easily solved with the Monster Hunter World Builds that we have prepared for you.
With it you will learn what combination of equipment, armor, enchantments and other accessories you need to become a great hunter and, with some skill and a little more luck, overcome all the challenges of a really challenging game.


What are the best MHW builds?
At this point it is important to note that all MHW builds depend on the equipment you decide to use, especially weapons. As you could see in our article about the tier list of weapons from Monster Hunter World , this game presents a huge variety of options in this area.
Which makes creating a guide that explores all possible configurations is as titanic a task as the very creatures that will try to end your game.
Consequently, HDGamers brings you the best Monster Hunter World Builds based on the most effective weapons in the game and what you need to achieve all their potential.
Bow
- Endgame Fatalis Armor.
- Alatreon Armor.
- Namielle Stamina.
Dual Blades
- Fatalis Armor Set.
- Blast Dual Blades.
- Ice Kulve Taroth Dual Blades.
Light Bowgun
- Endgame Fatalis Armor with Alatreon LBG.
- Ammo Saving Pierce.
- Safi’jiiva Armor.
Heavy Bowgun
- Endgame Fatalis Armor.
- Hi-Power Pierce HBG.
- Guard HBG.
How do I get the best Monster Hunter World builds?
As we have been proposing in each of the builds that HDGamers has brought, just knowing the name of them is not enough.
Therefore, in this second part of our guide we will show you what you need to get the most powerful and wonderful expressions of a star hunter from Monster Hunter World.
Endgame Fatalis Armor
Recommended Weapon for this configuration
- Bow of Vice & amp; Violence
- Recommended decorations for the weapon
- Attack Jewel +4
- Quantity: 1.
- Physique Jewel +4
- Quantity: 1.
- Attack Jewel +4
- Recommended decorations for the weapon
Recommended helmet for this configuration
- Safi Crested Crown Alpha +1
- Recommended decorations for the helmet
- Expert Jewel +1.
- Quantity: 2.
- Mighty Bow Jewel +2.
- Quantity: 1.
- Expert Jewel +1.
- Recommended decorations for the helmet
Recommended torso for this configuration
- Dragonhide Alpha +
- Recommended decorations for the torso
- Challenger Jewel +4.
- Quantity: 2.
- Shaver Jewel +3.
- Quantity: 1.
- Challenger Jewel +4.
- Recommended decorations for the torso
Recommended bracelets for this configuration
- Dragonclaws Beta +
- Recommended decorations for the Bracelets
- Challenger Jewel +4.
- Quantity: 1.
- Critical / Physique Jewel +4.
- Quantity: 2.
- Challenger Jewel +4.
- Recommended decorations for the Bracelets
Recommended belt for this configuration
- Dragonbarbs Alpha +
- Recommended decorations for the belt
- Expert Jewel +4.
- Quantity: 1.
- Spread Jewel +3.
- Quantity: 2.
- Expert Jewel +4.
- Recommended decorations for the belt
Recommended Legs for this configuration
- Dragonfeet Beta +
- Recommended decorations for the legs
- Forceshot Jewel +3.
- Quantity: 1.
- Challenger / Physique Jewel +4
- Quantity: 1.
- Forceshot Jewel +3.
- Recommended decorations for the legs
Recommended enchantment for this configuration
- Attack Charm V.
- Recommended decorations for the enchantment
- No Need.
- Recommended decorations for the enchantment
Skills for this configuration
- Critical Eye
- Points to climb: 7.
- Attack Boost
- Points to climb: 7.
- Agitator
- Points to climb: 7.
- Evade Window
- Points to climb: 5.
- Constitution
- Points to climb: 5.
- Fatalis Legend
- Points to climb: 4.
- Critical Boost
- Points to climb: 3.
- Weakness Exploit
- Points to climb: 3.
- Normal Shots
- Points to climb: 2.
- Spread / Power Shots
- Points to climb: 2.
- Clutch Claw Boost
- Points to climb: 1.
- Bow Charge Plus
- Points to climb: 1.
Alatreon Armor
Recommended Weapon for this configuration
- Kjarr Bow “Water”
- Recommended decorations for the weapon
- No Need.
- Recommended decorations for the weapon
Recommended helmet for this configuration
- Safi Crested Crown Beta +1
- Recommended decorations for the helmet
- Physique Jewel + 4
- Quantity: 1.
- Expert Jewel + 1
- Quantity: 2.
- Physique Jewel + 4
- Recommended decorations for the helmet
Recommended torso for this configuration
- Escadora Soul Beta +1.
- Recommended decorations for the torso
- Refresh / Expert Jewel 4
- Quantity: 1.
- Expert Jewel 1.
- Quantity: 2.
- Refresh / Expert Jewel 4
- Recommended decorations for the torso
Recommended bracelets for this configuration
- Safi Crested Vambraces Beta +
- Recommended decorations for the Bracelets
- Refresh / Expert Jewel 4
- Quantity: 1.
- Tenderizer Jewel 2
- Quantity: 2.
- Refresh / Expert Jewel 4
- Recommended decorations for the Bracelets
Recommended belt for this configuration
- Escadora Might Beta +1
- Recommended decorations for the belt
- Spread Jewel 3
- Quantity: 1.
- Expert Jewel 1
- Quantity: 1.
- Spread Jewel 3
- Recommended decorations for the belt
Recommended Legs for this configuration
- Safi Crested Boots Beta +1
- Recommended decorations for the legs
- Tenderizer / Physique Jewel 4
- Quantity: 1.
- Mighty BowJewel 2
- Quantity: 1.
- Stream Jewel 1
- Quantity: 1.
- Tenderizer / Physique Jewel 4
- Recommended decorations for the legs
Recommended enchantment for this configuration
- Flood Charm V
- Recommended decorations for the enchantment
- None.
- Recommended decorations for the enchantment
Skills to upload for this configuration
- Critical Eye
- Points to climb: 7.
- Water Attack
- Points to climb: 6
- Attack Boost
- Points to climb: 4.
- Health Boost
- Points to climb: 3.
- Dragon Resistance
- Points to climb: 3.
- Constitution
- Points to climb: 3.
- Critical Boost
- Points to climb: 2.
- Stamina Surge
- Points to climb: 2.
- Blight Resistance
- Points to climb: 1.
- Resentment
- Points to climb: 1.
- Evade Window
- Points to climb: 1.
- Spread / Power Shots
- Points to climb: 1.
- Bow Charge Plus
- Points to climb: 1.
- Alatreon Divinity
- Safi’jiiva Seal
Namielle Stamina
Recommended Weapon for this configuration
- Safi’s Boltbow
- Recommended decorations for the weapon
- Bolt Jewel +4
- Quantity: 1.
- Bolt Jewel +4
- Recommended decorations for the weapon
Recommended helmet for this configuration
- Tentacle Cowl Gamma +1
- Recommended decorations for the helmet
- Tenderizer / Vitality Jewel 4
- Quantity: 1.
- Mighty Bow Jewel 2
- Quantity: 1.
- Tenderizer / Vitality Jewel 4
- Recommended decorations for the helmet
Recommended torso for this configuration
- Safi Crested Chest Alpha +1
- Recommended decorations for the torso
- Spread Jewel 3
- Quantity: 1.
- Critical Jewel 2
- Quantity: 1.
- Spread Jewel 3
- Recommended decorations for the torso
Recommended bracelets for this configuration
- Safi Crested Vambraces Beta +1
- Recommended decorations for the Bracelets
- Bolt Jewel + 4
- Quantity: 1.
- Tenderizer Jewel 2
- Quantity: 2.
- Bolt Jewel + 4
- Recommended decorations for the Bracelets
Recommended belt for this configuration
- Safi Crested Belt Beta +1
- Recommended decorations for the belt
- Expert Jewel + 4
- Quantity: 1.
- Vitality Jewel 1
- Quantity: 1.
- Expert Jewel + 4
- Recommended decorations for the belt
Recommended Legs for this configuration
- Tentacle Greaves Gamma +1
- Recommended decorations for the legs
- Critical / Vitality Jewel 4
- Quantity: 1.
- Critical / Vitality Jewel 4
- Recommended decorations for the legs
Recommended enchantment for this configuration
- Master’s Charm IV
- Recommended decorations for the enchantment
- None.
- Recommended decorations for the enchantment
Skills to upload for this configuration
- Thunder Attack
- Points to climb: 6.
- Critical Eye
- Points to climb: 6.
- Constitution
- Points to climb: 4.
- Health Boost
- Points to climb: 3.
- Weakness Exploit
- Points to climb: 3.
- Critical Boost
- Points to climb: 3.
- Stamina Surge
- Points to climb: 3.
- Blight Resistance
- Points to climb: 3.
- Evade Window
- Points to climb: 2.
- Tool Specialist
- Points to climb: 1.
- Spread / Power Shots 1
- Points to climb: 1.
- Bow Charge Plus
- Points to climb: 1.
- Namielle Divinity
- Safi’jiiva Seal


Fatalis Armor Set
Recommended Weapon for this configuration
- Fatalis Dual Skies
- Recommended decorations for the weapon
- Dragon Jewel + 4
- Quantity: 2.
- Dragon Jewel + 4
- Recommended decorations for the weapon
Recommended helmet for this configuration
- Dragonhead Beta +1
- Recommended decorations for the helmet
- Throttle Jewel + 4
- Quantity: 3.
- Throttle Jewel + 4
- Recommended decorations for the helmet
Recommended torso for this configuration
- Dragonhide Beta +1
- Recommended decorations for the torso
- Attack Jewel + 4
- Quantity: 3.
- Attack Jewel + 4
- Recommended decorations for the torso
Recommended bracelets for this configuration
- Dragonclaws Beta +1
- Recommended decorations for the Bracelets
- Critical / Evasion Jewel 4
- Quantity: 1.
- Expert Jewel + 4
- Quantity: 1.
- Challenger Jewel + 4
- Quantity: 1.
- Critical / Evasion Jewel 4
- Recommended decorations for the Bracelets
Recommended belt for this configuration
- Dragonbarbs Alpha +1
- Recommended decorations for the belt
- Expert Jewel + 4
- Quantity: 1.
- Shaver Jewel 3
- Quantity: 1.
- Critical Jewel 2
- Quantity: 1.
- Expert Jewel + 4
- Recommended decorations for the belt
Recommended Legs for this configuration
- Rimeguard Greaves Gamma +1
- Recommended decorations for the legs
- Dragon Jewel + 4
- Quantity: 1.
- Critical Jewel 2
- Quantity: 1.
- Dragon Jewel + 4
- Recommended decorations for the legs
Recommended enchantment for this configuration
- Challenger Charm V
- Recommended decorations for the enchantment
- None.
- Recommended decorations for the enchantment
Skills for this configuration
- Critical Eye
- Points to climb: 7.
- Agitator
- Points to climb: 7.
- Attack Boost
- Points to climb: 6.
- Latent Power
- Points to climb: 6.
- Dragon Attack
- Points to climb: 6.
- Stun Resist
- Points to climb: 3.
- Critical Boost
- Points to climb: 3.
- Weakness Exploit
- Points to climb: 3.
- Peak Performance
- Points to climb: 3.
- Evade Window
- Points to climb: 2.
- Clutch Claw Boost
Blast Dual Blades
Recommended Weapon for this configuration
- Lightbreak Twins
- Recommended decorations for the weapon
- Tenderizer / Vitality Jewel 4
- Quantity: 1.
- Sprinter Jewel 2
- Quantity: 1.
- Tenderizer / Vitality Jewel 4
- Recommended decorations for the weapon
Recommended helmet for this configuration
- Brachydium Helm Beta +1
- Recommended decorations for the helmet
- Sprinter / Expert Jewel 4
- Quantity: 2.
- Blast Jewel 1
- Quantity: 1.
- Sprinter / Expert Jewel 4
- Recommended decorations for the helmet
Recommended torso for this configuration
- Kaiser Mail Beta +1
- Recommended decorations for the torso
- Critical / Vitality Jewel 4
- Quantity: 1.
- Expert Jewel 1
- Quantity: 2.
- Critical / Vitality Jewel 4
- Recommended decorations for the torso
Recommended bracelets for this configuration
- Brachydium Braces Beta +1
- Recommended decorations for the Bracelets
- Refresh / Expert Jewel 4
- Quantity: 2.
- Refresh / Expert Jewel 4
- Recommended decorations for the Bracelets
Recommended belt for this configuration
- Kaiser Coil Beta +1
- Recommended decorations for the belt
- Tenderizer / Vitality Jewel 4
- Quantity: 1.
- Critical Jewel 2
- Quantity: 1.
- Expert Jewel 1
- Quantity: 1.
- Tenderizer / Vitality Jewel 4
- Recommended decorations for the belt
Recommended Legs for this configuration
- Kaiser Greaves Beta +1
- Recommended decorations for the legs
- Critical / Medicine Jewel 4
- Quantity: 1.
- Critical / Medicine Jewel 4
- Recommended decorations for the legs
Recommended enchantment for this configuration
- Challenger Charm V
- Recommended decorations for the enchantment
- None.
- Recommended decorations for the enchantment
Skills for this configuration
- Critical Eye
- Points to climb: 7.
- Agitator
- Points to climb: 7.
- Blast Attack
- Points to climb: 4.
- Health Boost
- Points to climb: 3.
- Critical Boost
- Points to climb: 3.
- Weakness Exploit
- Points to climb: 3.
- Latent Power
- Points to climb: 3.
- Marathon Runner
- Points to climb: 3.
- Stamina Surge
- Points to climb: 2.
- Recovery Up
- Points to climb: 1.
- Teostra Technique
- Brachydios Will
Ice Kulve Taroth Dual Blades
Recommended Weapon for this configuration
- Kjarr Daggers “Ice”
- Recommended decorations for the weapon
- Defense Jewel 1
- Quantity: 1.
- Defense Jewel 1
- Recommended decorations for the weapon
Recommended helmet for this configuration
- Kaiser Crown Beta +1
- Recommended decorations for the helmet
- Sprinter / Expert Jewel 4
- Quantity: 1.
- Sprinter / Expert Jewel 4
- Recommended decorations for the helmet
Recommended torso for this configuration
- Escadora Might Beta +1
- Recommended decorations for the torso
- Refresh / Expert Jewel 4
- Quantity: 1.
- Expert Jewel 1
- Quantity: 2.
- Refresh / Expert Jewel 4
- Recommended decorations for the torso
Recommended bracelets for this configuration
- Kaiser Vambraces Beta +1
- Recommended decorations for the Bracelets
- Refresh / Expert Jewel 4
- Quantity: 1.
- Tenderizer Jewel 2
- Quantity: 1.
- Refresh / Expert Jewel 4
- Recommended decorations for the Bracelets
Recommended belt for this configuration
- Kaiser Coil Beta +1
- Recommended decorations for the belt
- Brace / EvasionJewel 4
- Quantity: 1.
- Critical Jewel 2
- Quantity: 1.
- Brace / EvasionJewel 4
- Recommended decorations for the belt
Recommended Legs for this configuration
- Escadora Sheath Beta +1
- Recommended decorations for the legs
- Tenderizer / Evasion Jewel 4
- Quantity: 1.
- Critical / Evasion Jewel 4
- Quantity: 1.
- Critical Jewel 2
- Quantity: 1.
- Tenderizer / Evasion Jewel 4
- Recommended decorations for the legs
Recommended enchantment for this configuration
- Frost Charm V
- Recommended decorations for the enchantment
- None.
- Recommended decorations for the enchantment
Skills for this configuration
- Critical Eye
- Points to climb: 7.
- Ice Attack
- Points to climb: 6.
- Defense Boost
- Points to climb: 4.
- Health Boost
- Points to climb: 3.
- Critical Boost
- Points to climb: 3.
- Weakness Exploit
- Points to climb: 3.
- Evade Window
- Points to climb: 3.
- Blast Attack
- Points to climb: 2.
- Stamina Surge
- Points to climb: 2.
- Heat Guard
- Points to climb: 1.
- Latent Power
- Points to climb: 1.
- Resentment
- Points to climb: 1.
- Marathon Runner
- Points to climb: 1.
- Flinch Free
- Points to climb: 1.
- Teostra Technique
- Alatreon Divinity
- Points to climb: 2.

Endgame Fatalis Armor with Alatreon LBG
Recommended Weapon for this configuration
- Alatreon Dominator
- Recommended decorations for the weapon
- Critical Jewel 2
- Quantity: 1.
- Expert Jewel 1
- Quantity: 1.
- Critical Jewel 2
- Recommended decorations for the weapon
Recommended helmet for this configuration
- Dragonhead Beta +1
- Recommended decorations for the helmet
- Blaze Jewel + 4
- Quantity: 3.
- Blaze Jewel + 4
- Recommended decorations for the helmet
Recommended torso for this configuration
- Dragonhide Beta +1
- Recommended decorations for the torso
- Critical / Maintenance Jewel 4
- Quantity: 1.
- Expert Jewel + 4
- Quantity: 2.
- Critical / Maintenance Jewel 4
- Recommended decorations for the torso
Recommended bracelets for this configuration
- Brachydios Braces Beta +1
- Recommended decorations for the Bracelets
- Evasion Jewel + 4
- Quantity: 1.
- Shaver Jewel 3
- Quantity: 1.
- Evasion Jewel + 4
- Recommended decorations for the Bracelets
Recommended belt for this configuration
- Dragonbarbs Beta +1
- Recommended decorations for the belt
- Critical / Maintenance Jewel 4
- Quantity: 1.
- Tenderizer / Protection Jewel 4
- Quantity: 2.
- Critical / Maintenance Jewel 4
- Recommended decorations for the belt
Recommended Legs for this configuration
- Dragonfeet Beta +1
- Recommended decorations for the legs
- Release / Protection Jewel 4
- Quantity: 3.
- Release / Protection Jewel 4
- Recommended decorations for the legs
Recommended enchantment for this configuration
- Challenger Charm V
- Recommended decorations for the enchantment
- None.
- Recommended decorations for the enchantment
Skills for this configuration
- Critical Eye
- Points to climb: 7.
- Agitator
- Points to climb: 7.
- Fire Attack
- Points to climb: 6.
- Divine Blessing
- Points to climb: 5.
- Evade Window
- Points to climb: 4.
- Stun Resistance
- Points to climb: 3.
- Free Elem / Ammo Up
- Points to climb: 3.
- Critical Boost
- Points to climb: 3.
- Weakness Exploit
- Points to climb: 3.
- Tool Specialist
- Points to climb: 2.
- Clutch Claw Boost
- Points to climb: 1.
- Fatalis Legend
- Points to climb: 4.
- Ammo Saving Pierce
Recommended Weapon for this configuration
- Safi’s Aquashot
- Recommended decorations for the weapon
- Release / Vitality Jewel 4
- Quantity: 1.
- Release / Vitality Jewel 4
- Recommended decorations for the weapon
Recommended helmet for this configuration
- Nargacuga Helm Alpha +1
- Recommended decorations for the helmet
- Artillery Jewel 1
- Quantity: 2.
- Artillery Jewel 1
- Recommended decorations for the helmet
Recommended torso for this configuration
- Zorah Hide Alpha +1
- Recommended decorations for the torso
- Release Jewel 3
- Quantity: 1.
- Artillery Jewel 1
- Quantity: 1.
- Release Jewel 3
- Recommended decorations for the torso
Recommended bracelets for this configuration
- Zorah Claws Alpha +1
- Recommended decorations for the Bracelets
- Release / Vitality Jewel 4
- Quantity: 1.
- Attack Jewel 1
- Quantity: 1.
- Release / Vitality Jewel 4
- Recommended decorations for the Bracelets
Recommended belt for this configuration
- Nargacuga Faulds Beta +1
- Recommended decorations for the belt
- KO / Vitality Jewel 4
- Quantity: 1.
- KO / Vitality Jewel 4
- Recommended decorations for the belt
Recommended Legs for this configuration
- Nargacuga Greaves Alpha +1
- Recommended decorations for the legs
- Attack Jewel 1
- Quantity: 1.
- Trueshot Jewel 1
- Quantity: 1.
- Attack Jewel 1
- Recommended decorations for the legs
Recommended enchantment for this configuration
- Attack Charm V
- Recommended decorations for the enchantment
- None.
- Recommended decorations for the enchantment
Skills for this configuration
- Attack Boost
- Points to climb: 7.
- Artillery
- Points to climb: 5.
- Peak Performance 3
- Points to climb: 3.
- Health Boost
- Points to climb: 3.
- Free Elem / Ammo Up
- Points to climb: 3.
- Evade Window
- Points to climb: 2.
- Flinch Free
- Points to climb: 2.
- Slugger
- Points to climb: 1.
- Special Ammo Boost
- Points to upload: 1.
- Nargacuga Essence
- Points to climb: 3.
- Zorah Magdaros Essence
- Points to climb: 3.
Safi’jiiva Armor
Recommended Weapon for this configuration
- Alatreon Dominator
- Recommended decorations for the weapon
- Tenderizer Jewel 2
- Quantity: 2.
- Tenderizer Jewel 2
- Recommended decorations for the weapon
Recommended helmet for this configuration
- Safi Crested Crown Beta +1
- Recommended decorations for the helmet
- Blaze Jewel + 4
- Quantity: 1.
- Blaze Jewel 1
- Quantity: 2.
- Blaze Jewel + 4
- Recommended decorations for the helmet
Recommended torso for this configuration
- Safi Crested Chest Beta +1
- Recommended decorations for the torso
- Furor Jewel + 4
- Quantity: 1.
- Furor Jewel 2
- Quantity: 1.
- Furor Jewel + 4
- Recommended decorations for the torso
Recommended bracelets for this configuration
- Safi Crested Vambraces Beta +1
- Recommended decorations for the Bracelets
- Release / Vitality Jewel 4
- Quantity: 1.
- Furor Jewel 2
- Quantity: 2.
- Release / Vitality Jewel 4
- Recommended decorations for the Bracelets
Recommended belt for this configuration
- Safi Crested Belt Beta +1
- Recommended decorations for the belt
- Release / Vitality Jewel 4
- Quantity: 1.
- Blaze Jewel 1
- Quantity: 1.
- Release / Vitality Jewel 4
- Recommended decorations for the belt
Recommended Legs for this configuration
- Safi Crested Boots Beta +1
- Recommended decorations for the legs
- Release / Vitality Jewel 4
- Quantity: 1.
- Tenderizer Jewel 2
- Quantity: 1.
- Blaze Jewel 1
- Quantity: 1.
- Release / Vitality Jewel 4
- Recommended decorations for the legs
Recommended enchantment for this configuration
- Razor Sharp Charm
- Recommended decorations for the enchantment
- None.
- Recommended decorations for the enchantment
Skills for this configuration
- Fire Attack
- Points to climb: 6.
- Resentment
- Points to climb: 5.
- Health Boost
- Points to climb: 3.
- Free Elem / Ammo Up
- Points to climb: 3.
- Critical Boost
- Points to climb: 3.
- Weakness Exploit
- Points to climb: 3.
- Evade Window
- Points to climb: 3.
- Blight Resistance
- Points to climb: 2.
- Razor Sharp / Spare Shot
- Points to climb: 1.

Endgame Fatalis Armor
Recommended Weapon for this configuration
- Vor Buster
- Recommended decorations for the weapon
- Jumping / Evasion Jewel 4
- Quantity: 1.
- Brace / Protection Jewel 4
- Quantity: 1.
- Jumping / Evasion Jewel 4
- Recommended decorations for the weapon
Recommended helmet for this configuration
- Dragonhead Beta +1
- Recommended decorations for the helmet
- Challenger Jewel + 4
- Quantity: 3.
- Challenger Jewel + 4
- Recommended decorations for the helmet
Recommended torso for this configuration
- Dragonhide Beta +1
- Recommended decorations for the torso
- Mighty / Protection Jewel 4
- Quantity: 3.
- Mighty / Protection Jewel 4
- Recommended decorations for the torso
Recommended bracelets for this configuration
- Dragonclaws Beta +1
- Recommended decorations for the Bracelets
- Challenger / Protection Jewel 4
- Quantity: 1.
- Mighty / Maintenance Jewel 4
- Quantity: 2.
- Challenger / Protection Jewel 4
- Recommended decorations for the Bracelets
Recommended belt for this configuration
- Dragonbarbs Beta +1
- Recommended decorations for the belt
- Attack Jewel + 4
- Quantity: 1.
- Spread Jewel 3
- Quantity: 2.
- Attack Jewel + 4
- Recommended decorations for the belt
Recommended Legs for this configuration
- Kulve Taroth’s Wrath Beta +1
- Recommended decorations for the legs
- Critical / Maintenance Jewel 4 x1
- Quantity: 1.
- Maintenance Jewel
- Quantity: 1.
- Critical / Maintenance Jewel 4 x1
- Recommended decorations for the legs
Recommended enchantment for this configuration
- Attack Charm V
- Recommended decorations for the enchantment
- None.
- Recommended decorations for the enchantment
Skills for this configuration
- Attack Boost
- Points to climb: 7.
- Agitator
- Points to climb: 7.
- Maximum Might
- Points to climb: 5.
- Divine Blessing
- Points to climb: 5.
- Tool Specialist
- Points to climb: 5.
- Stun Resistance
- Points to climb: 3.
- Critical Boost
- Points to climb: 3.
- Weakness Exploit
- Points to climb: 3.
- Critical Eye
- Points to climb: 3.
- Spread / Power Shots
- Points to climb: 2.
- Evade Window
- Points to climb: 2.
- Evade Extender
- Points to climb: 1.
- Flinch Free
- Points to climb: 1.
- Fatalis Legend
- Points to climb: 4.
Hi-Power Pierce HBG
Recommended Weapon for this configuration
- Safi’s Snipecannon
- Recommended decorations for the weapon
- Pierce Jewel 3
- Quantity: 1.
- Pierce Jewel 3
- Recommended decorations for the weapon
Recommended helmet for this configuration
- Dragonking Eyepatch Alpha
- Recommended decorations for the helmet
- Pierce Jewel 3
- Quantity: 1.
- Pierce Jewel 3
- Recommended decorations for the helmet
Recommended torso for this configuration
- Empress Mail Alpha
- Recommended decorations for the torso
- Steadfast Jewel 1
- Quantity: 2.
- Steadfast Jewel 1
- Recommended decorations for the torso
Recommended bracelets for this configuration
- Xeno’jiiva Claws Alpha
- Recommended decorations for the Bracelets
- Expert Jewel 1
- Quantity: 1.
- Expert Jewel 1
- Recommended decorations for the Bracelets
Recommended belt for this configuration
- Damascus Coil Beta
- Recommended decorations for the belt
- Protection Jewel 1
- Quantity: 3.
- Protection Jewel 1
- Recommended decorations for the belt
Recommended Legs for this configuration
- Empress Greaves Beta
- Recommended decorations for the legs
- Tenderizer Jewel 2
- Quantity: 1.
- Steadfast Jewel 1
- Quantity: 1.
- Tenderizer Jewel 2
- Recommended decorations for the legs
Recommended enchantment for this configuration
- Master’s Charm III
- Recommended decorations for the enchantment
- None.
- Recommended decorations for the enchantment
Skills for this configuration
- Critical Eye
- Points to climb: 4.
- Weakness Exploit
- Points to climb: 3.
- Divine Blessing
- Points to climb: 3.
- Health Boost
- Points to climb: 3.
- Stun Resistance
- Points to climb: 3.
- Peak Performance
- Points to climb: 2.
- Piercing Shots
- Points to climb: 1.
- Critical Boost
- Points to climb: 1.
- Flinch Free
- Points to climb: 1.
- Focus
- Points to climb: 1.
- Lunastra Favor
Guard HBG
Recommended Weapon for this configuration
- Loyal Thunder
- Recommended decorations for the weapon
- Tenderizer Jewel 2
- Quantity: 1.
- Tenderizer Jewel 2
- Recommended decorations for the weapon
Recommended helmet for this configuration
- Golden Headdress Beta +1
- Recommended decorations for the helmet
- Critical / Vitality Jewel 4
- Quantity: 1.
- Expert Jewel 1
- Quantity: 1.
- Critical / Vitality Jewel 4
- Recommended decorations for the helmet
Recommended torso for this configuration
- Pride Mail Beta +1
- Recommended decorations for the torso
- Expert Jewel + 4
- Quantity: 1.
- Expert Jewel 1
- Quantity: 2.
- Expert Jewel + 4
Recommended bracelets for this configuration
- Golden Kote Beta +1
- Recommended decorations for the Bracelets
- Ironwall / Release Jewel 4
- Quantity: 1.
- Spread Jewel 3
- Quantity: 1.
- Ironwall / Release Jewel 4
- Recommended decorations for the Bracelets
Recommended belt for this configuration
- Shara Ishvalda Coil Beta +1
- Recommended decorations for the belt
- Ironwall / Release Jewel 4
- Quantity: 1.
- Spread Jewel 3
- Quantity: 1.
- Ironwall / Release Jewel 4
- Recommended decorations for the belt
Recommended Legs for this configuration
- Garuga Greaves Beta +1
- Recommended decorations for the legs
- Ironwall / Release Jewel 4
- Quantity: 1.
- Critical Jewel 2
- Quantity: 2.
- Ironwall / Release Jewel 4
- Recommended decorations for the legs
Recommended enchantment for this configuration
- Razor Sharp Charm
- Recommended decorations for the enchantment
- None.
Skills for this configuration
- Health Boost
- Points to climb: 3.
- Critical Boost
- Points to climb: 3.
- Guard
- Points to climb: 5.
- Spread / Power Shots
- Points to climb: 2.
- Weakness Exploit
- Points to climb: 3.
- Resentment
- Points to upload: 1.
- Free Elem / Ammo Up
- Points to climb: 3.
- Critical Eye
- Points to climb: 7.
- Rajang’s Rage
- Points to climb: 2.
- Razor Sharp /Spare Shot
Latest recommendations on MHW Builds
Although it is true that the use of MHW Builds that we present will give you greater opportunities to have a powerful character. This does not guarantee total success in the game.
To do this, you will have to use your skills and abilities to overcome each obstacle in the game. In addition, over time you will be able to create your own configurations.
Before you finish, remember to visit some of our most read articles:
- Diablo 2 Builds
- Borderlands 3 Amara Builds
- Dark Souls Builds
- Dragon Age Inquisition Builds
- Fallout New Vegas Builds
We hope you have enjoyed this post and that you found the information you were looking for. If you think that we should update any information about MHW Builds or that we have made a mistake, do not hesitate to write to us!